
Week seven: Make a tent for backyard camping
Kids don’t have parental backup at camp. Foster that confidence at home by having them make a tent to sleep outside on their own.
LIFE SKILL: Confidence
What you'll need:
• 6 medium-size boxes. Aim for 18-by-18-by-16 inches (length-by-width-by-height). Similar size boxes are easier for kids to use.
• Scissors
• Marker
• Masking or packing tape
Step 1: Make your “building supplies.”
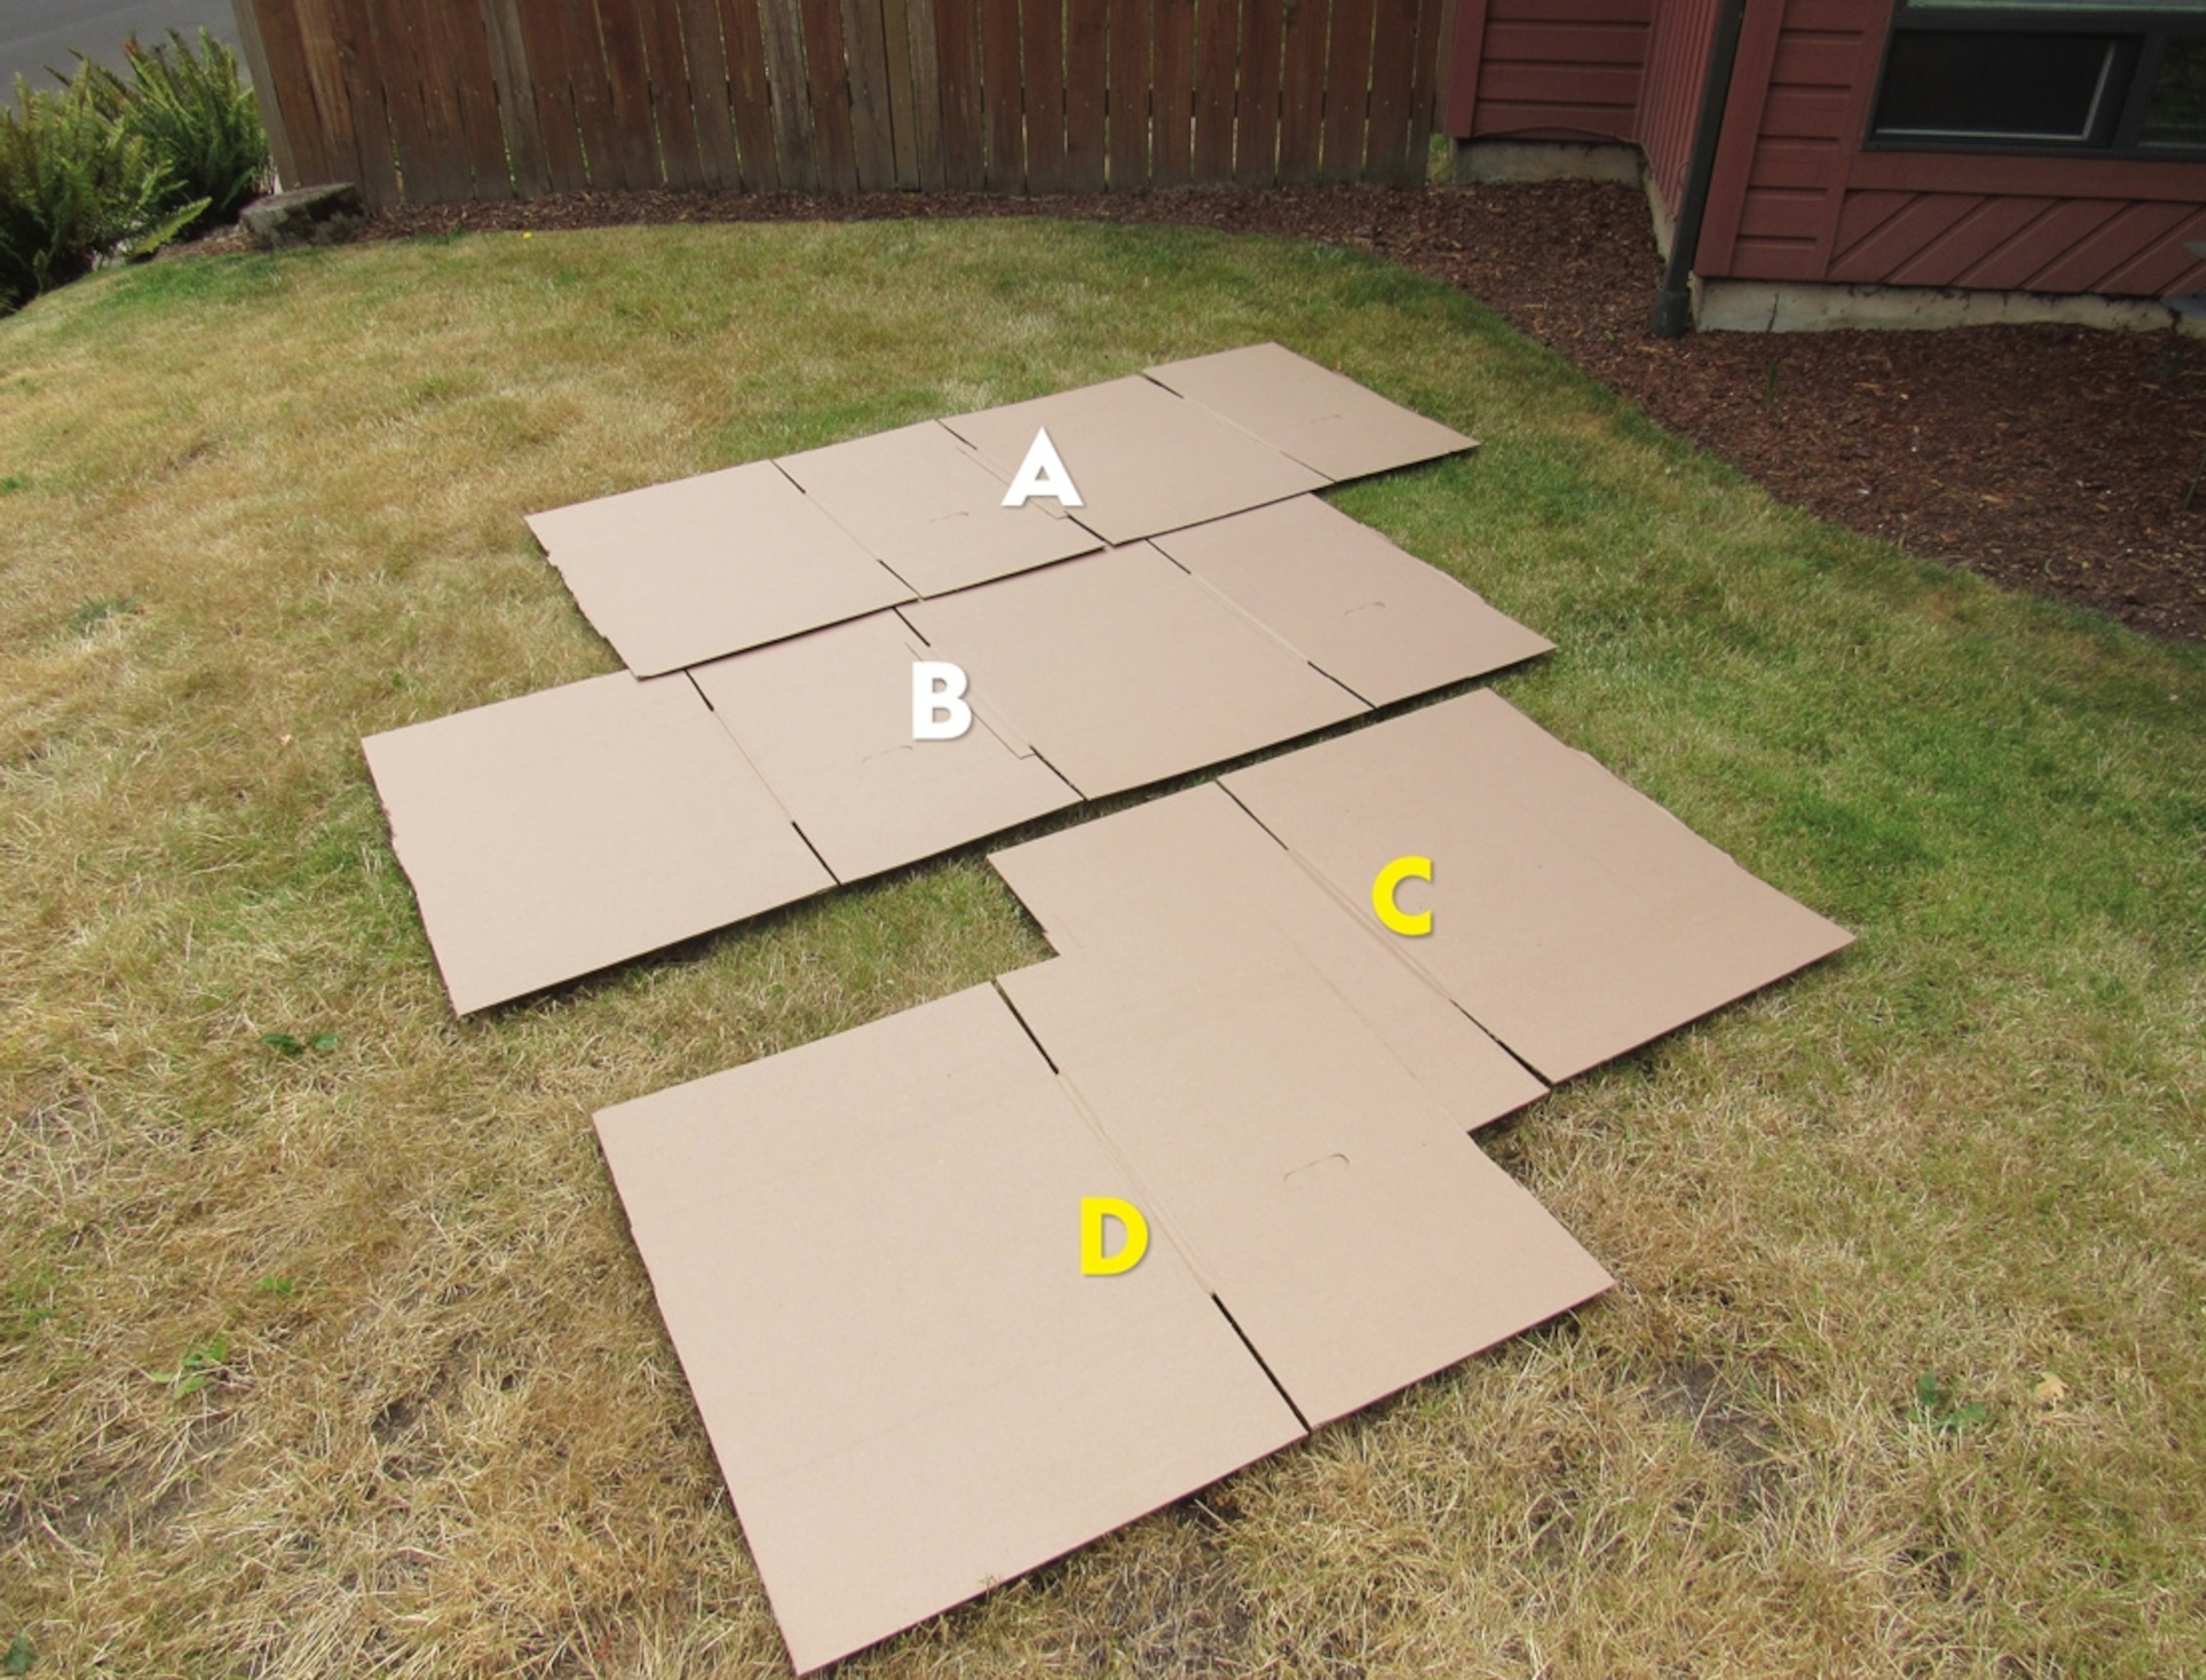
—Open the top and bottom of each box so that the lids’ flaps are vertical.
—Grab four of the boxes. Cut down the seam between two of the lid panels from top to bottom to create one long piece with 4 flaps on each side.
—Use a marker to write “A” on one opened box and “B” on another. These will be the long sides of the tent and its door.
—Cut the other two boxes top to bottom down the center fold. Now you have four pieces with two flaps on each side. These will be the back wall and roof.
—Use a marker to write a “C” on one of the smaller pieces; this will be the back of the tent. “D,” “E,” and “F” will be the roof.
Step 2: Build the frame

—Bend one panel of Pieces A and B at 90 degrees. Set the long pieces opposite of each other so that the bent pieces touch, like you have one “L” shape and one backward “L” shape facing each other. (This will be the tent door.)
Step 3: Start the roof and door.
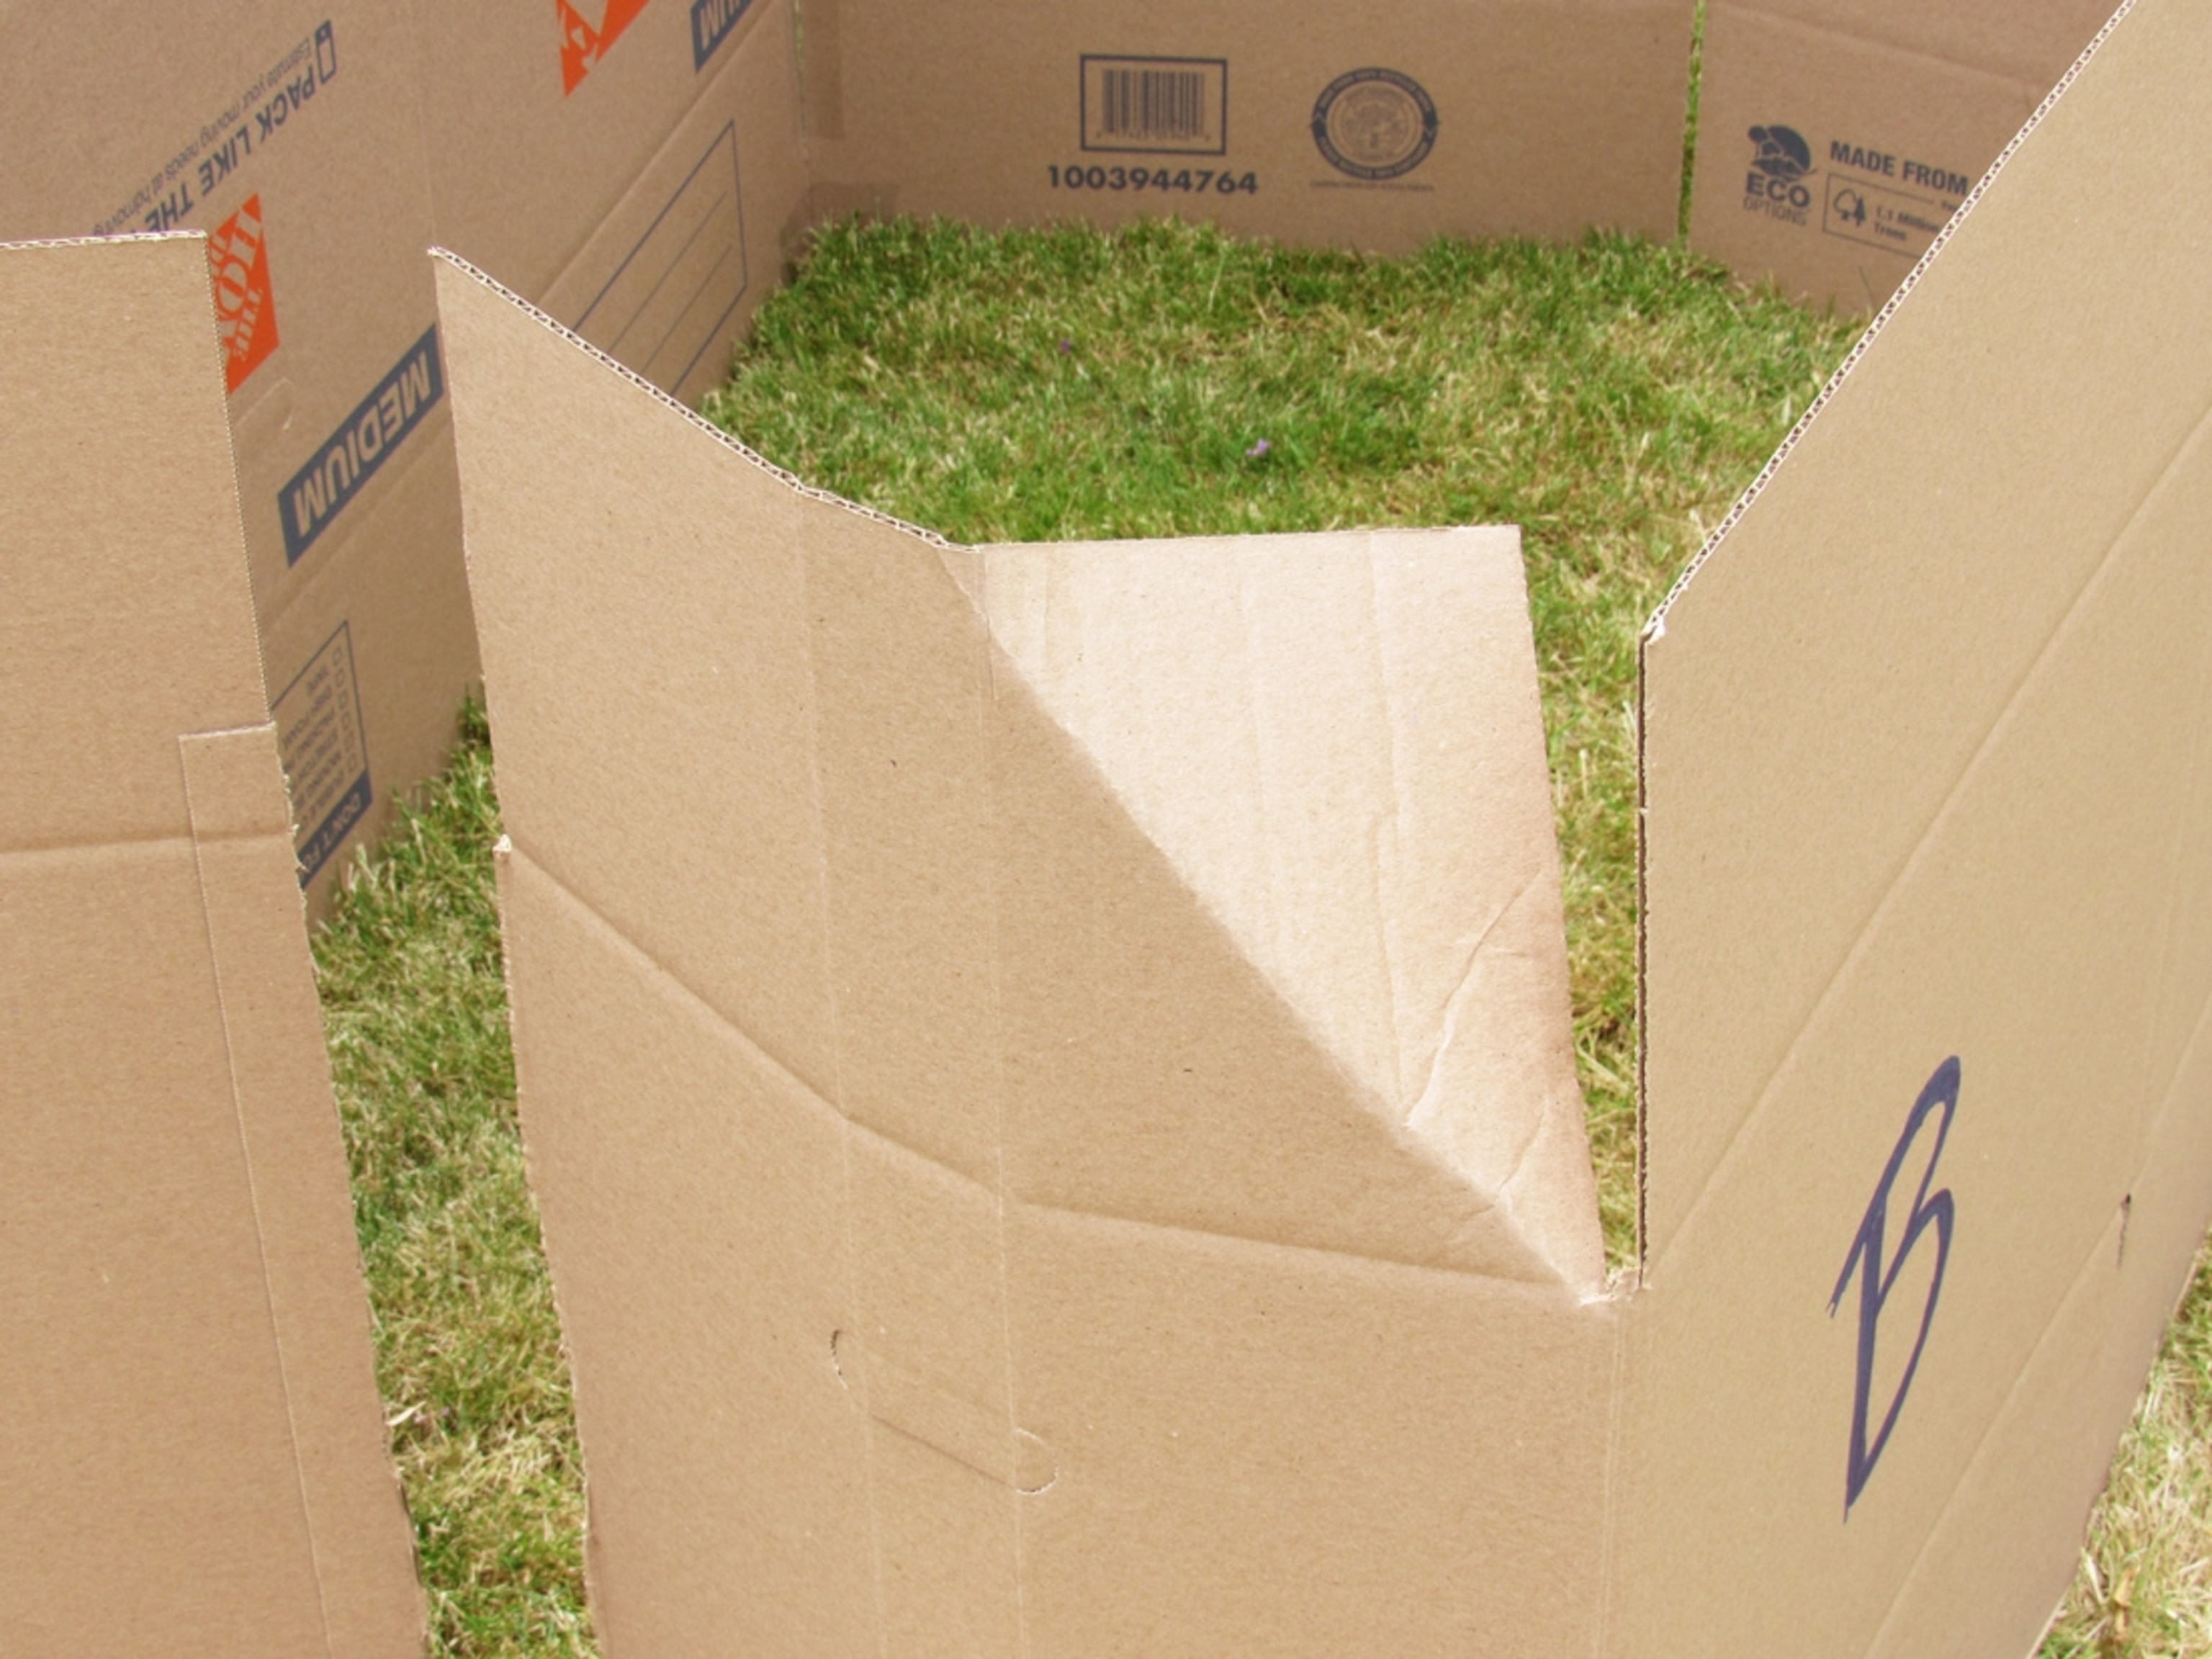
—Diagonally fold down the outside corner edge of the door flap section of Piece A toward the inside of the tent. Do the same thing on Piece B. This helps shape the roof.
—Fold the door sections of Pieces A and B vertically in half—right at the center—toward the outside of the tent. This creates the tent doors.
Step 4: Add stability.
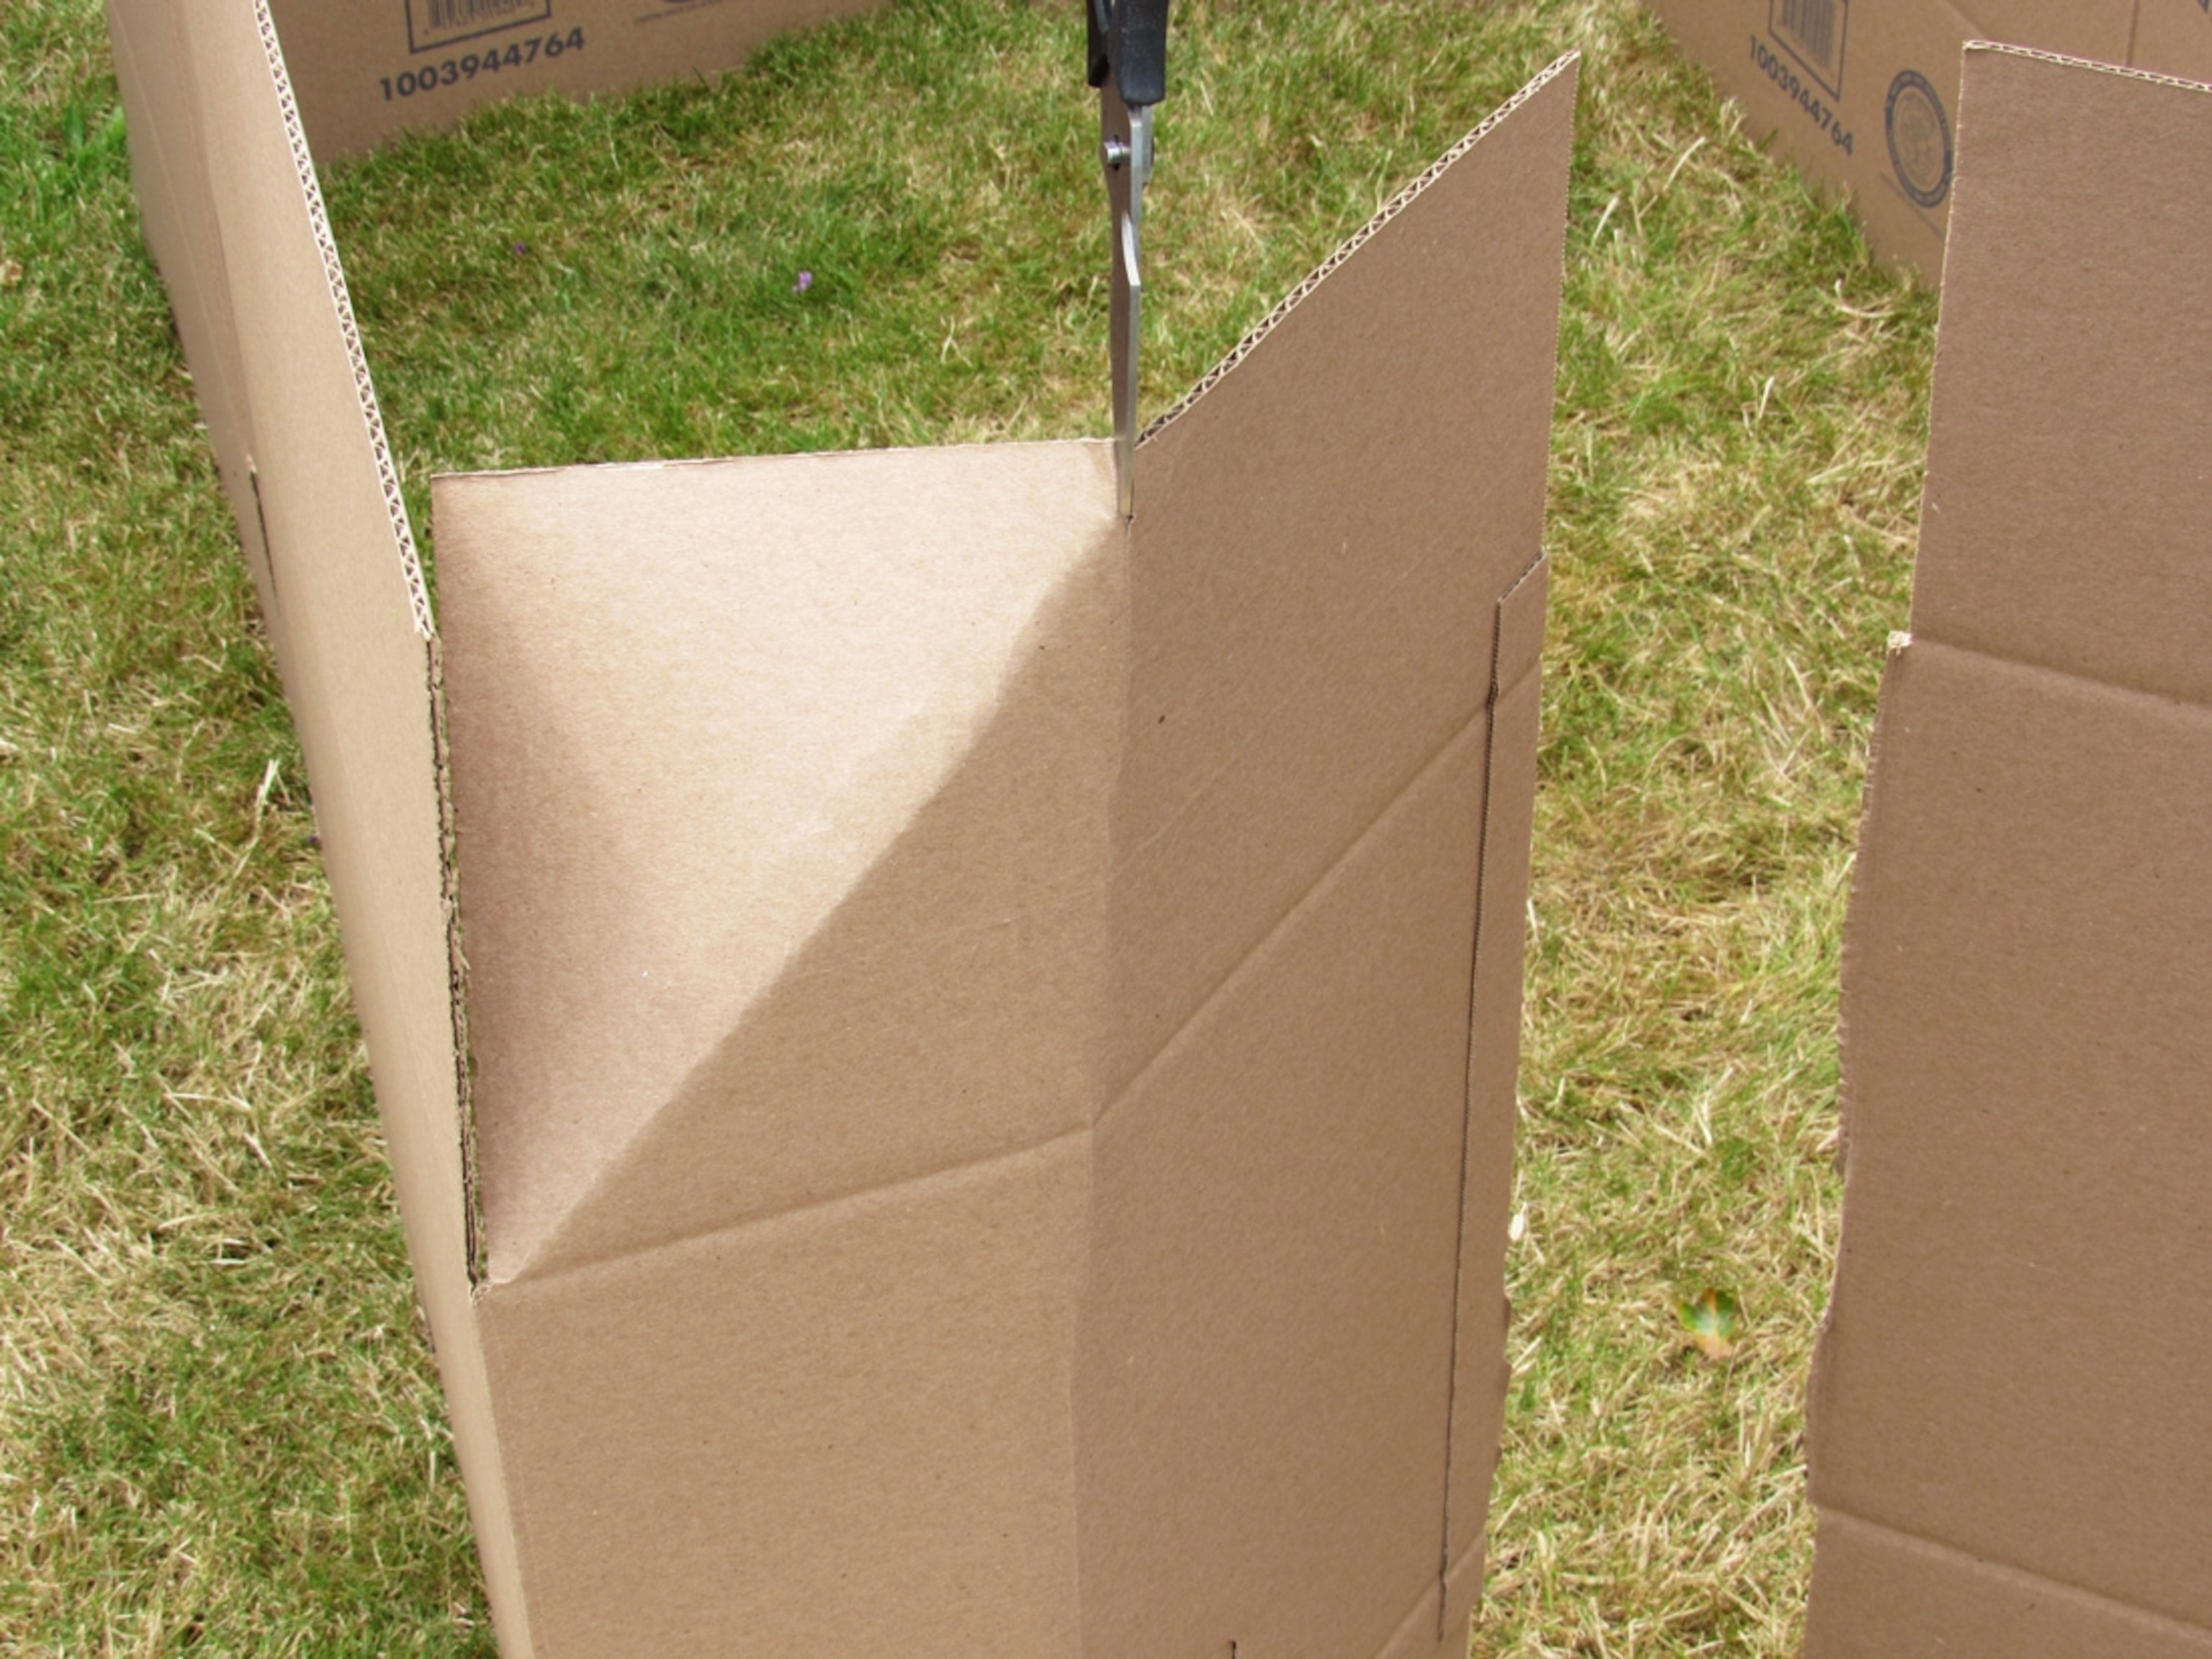
—At the top of each center fold, cut a small vertical slit, stopping at the diagonal fold. This helps hold the doors open and creates stability.
Step 5: Add the back wall.

—Place Piece C on the opposite side of the tent door at the edge of Pieces A and B. Tape one side of Piece C to Piece A and the other to Piece B. This is the back wall of the tent.
—On Piece C, fold the outside corner edges of the top flaps diagonally toward the inside of the tent to help create the roof.
—Form the roof by slightly bending the top flaps of Pieces A and B toward the middle of the tent.
Step 6: Put it all together

—Bend Pieces D, E, and F down the middle to form a bottomless triangle. Place these over the bent flaps of Pieces A and B until the tent is completely covered.
—Tape along the edges, corners, and overlapping sections to make the tent sturdier.
—Decorate the tent with washable tempera paint. Add your camp name, logo, or just go wild!
Step 7: Camp!
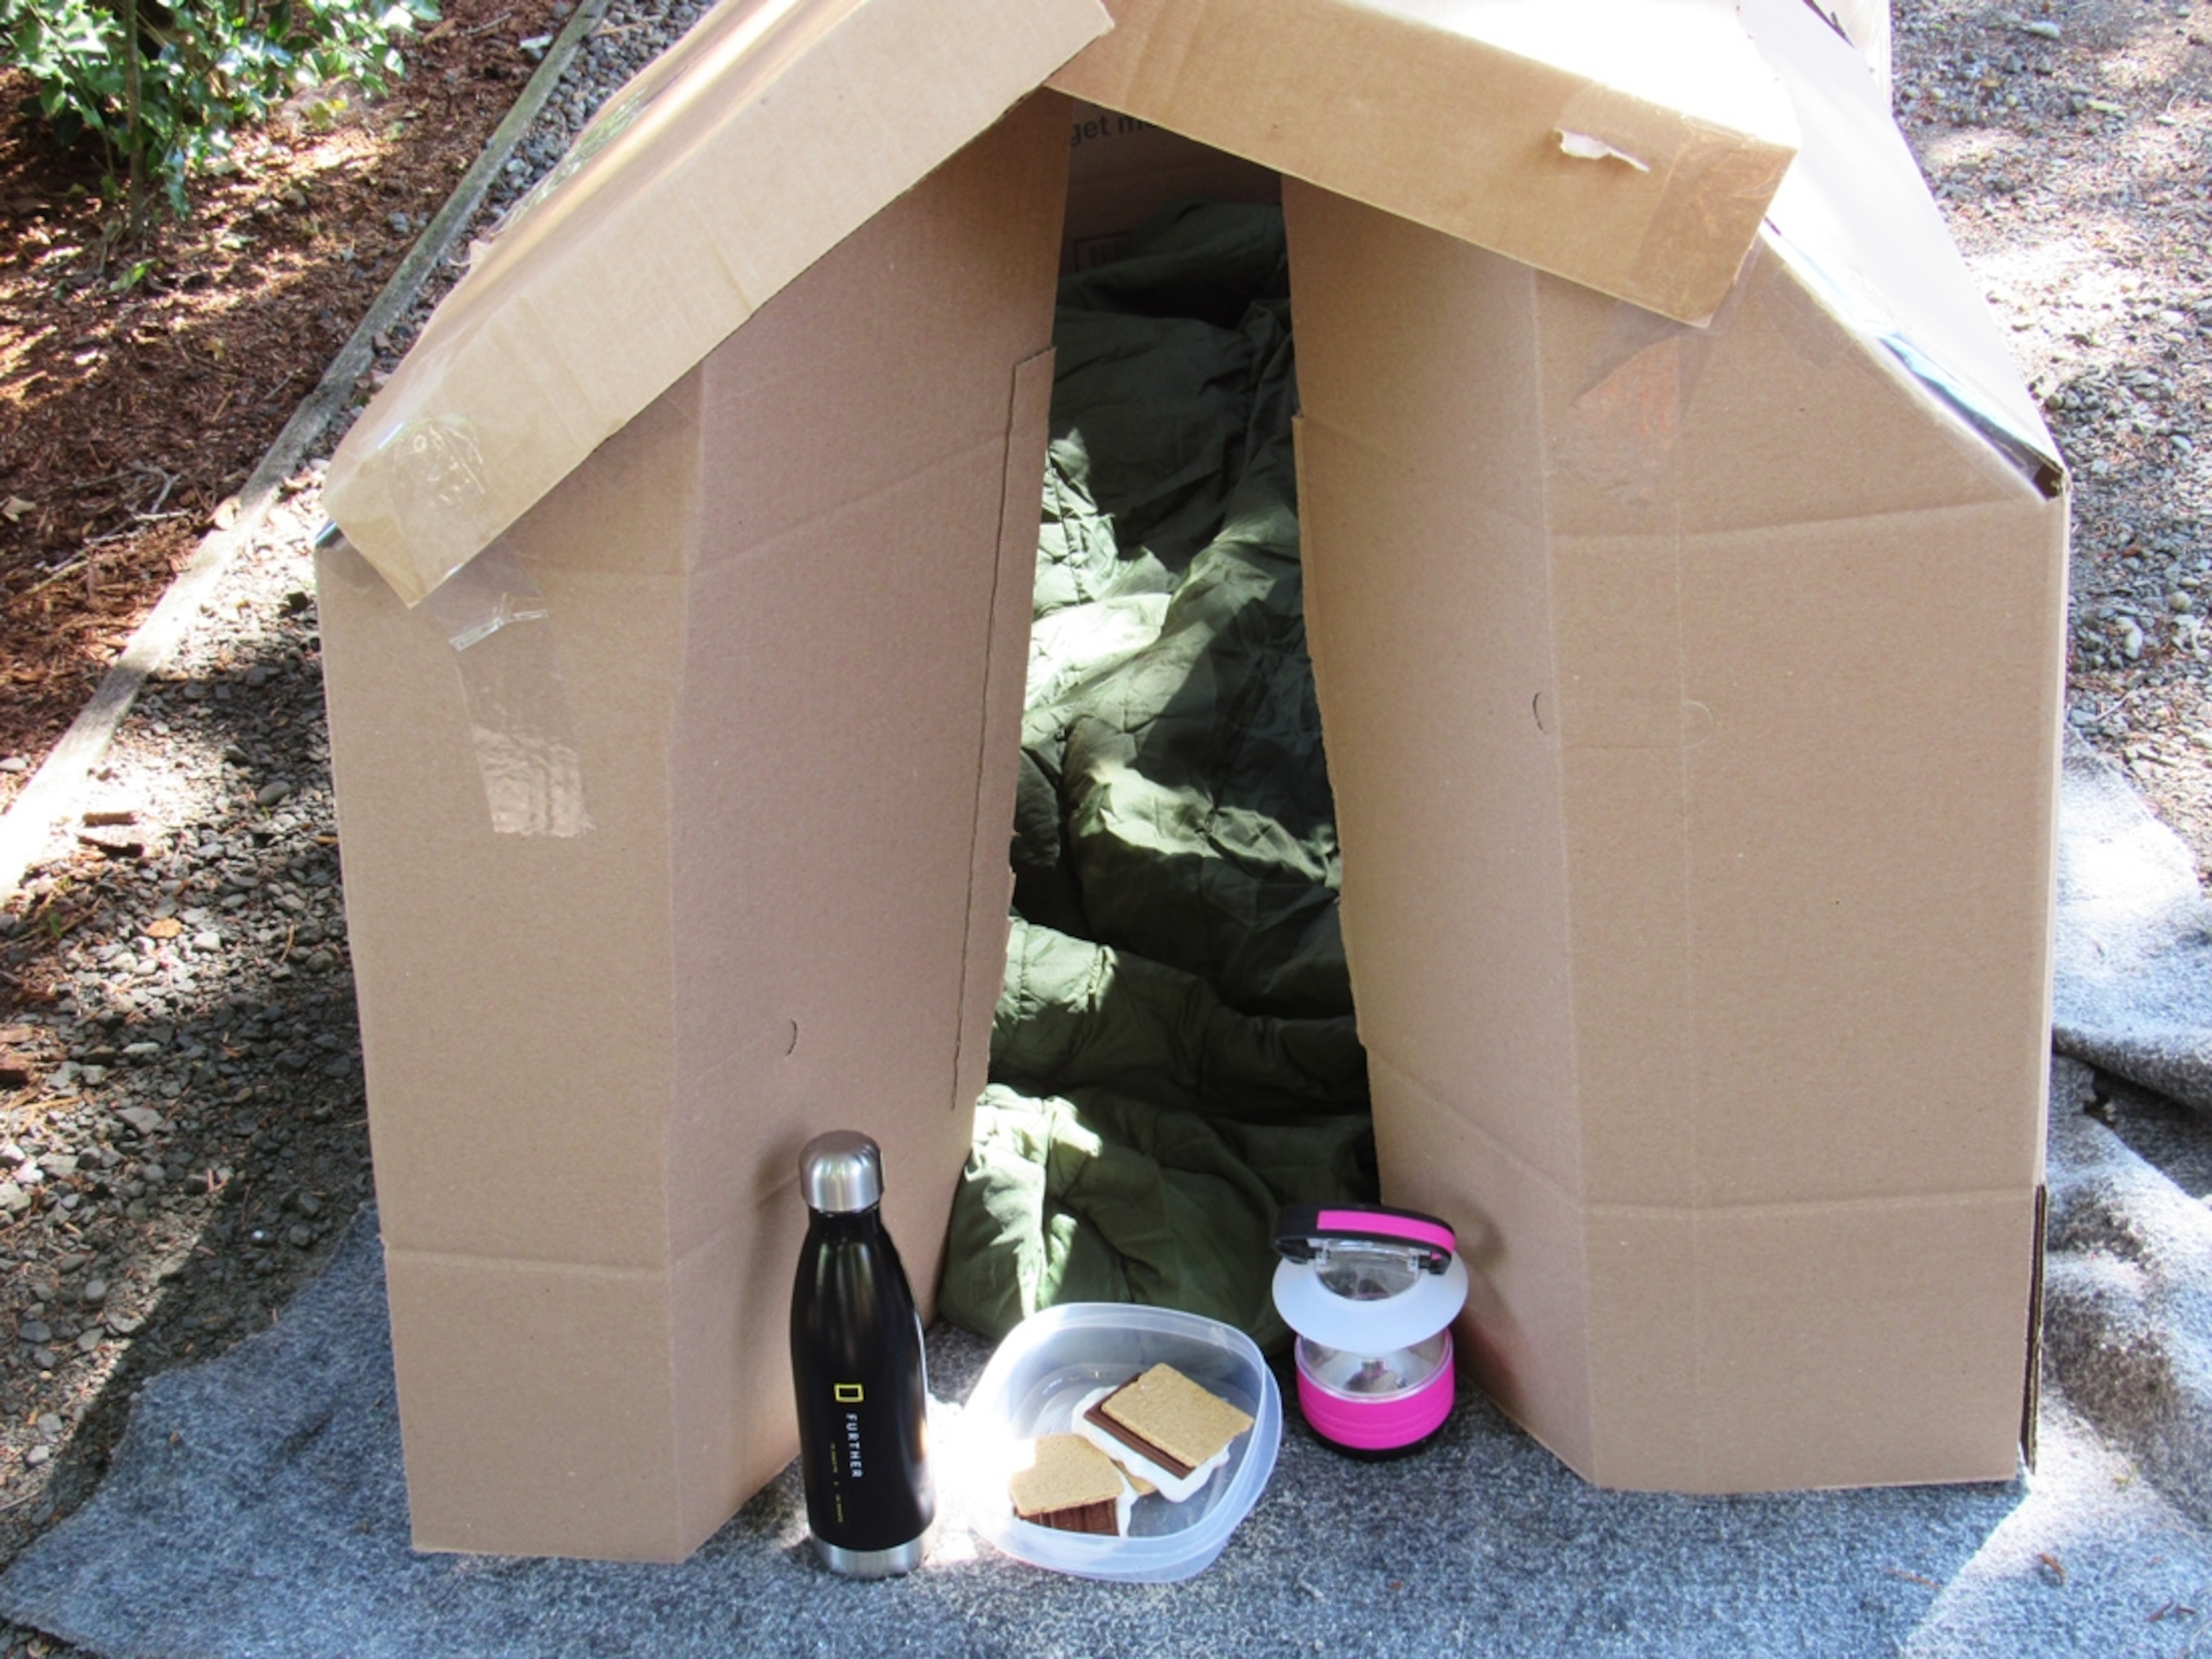
—Set up the tent on a flat, dry surface in the backyard, on the patio, or in the living room. If your child is camping outside, make sure the weather will be clear.
—Place the tent on top of a clean tarp or large blanket.
—Organize the inside of the tent so everything’s easy to find at night. Use a small box to keep things like a flashlight, phone (to contact base camp, aka Mom and Dad), and canteen within reach.
—Get kids confident and comfortable about sleeping outside. Hang out in the tent during the day, or spend a couple of hours with them after dark playing favorite games or eating snacks before they camp solo.
—For extra light, place glowsticks inside six clear empty plastic containers.
